Setup
Summary
- Add vRO Ansible Tower Endpoint in vRA
- Configure Ansible Tower playbooks for use with plug-in
- Configure Blueprint to use the Ansible Tower Endpoint
Add vRO Ansible Tower Endpoint in vRA
1. Login to vRA tenant
2. Go to Administration -> vRO Configuration -> Endpoints
3. Click + New

Fig 3.1
4. Select Ansible Tower from the Plug-in drop-down list and click Next
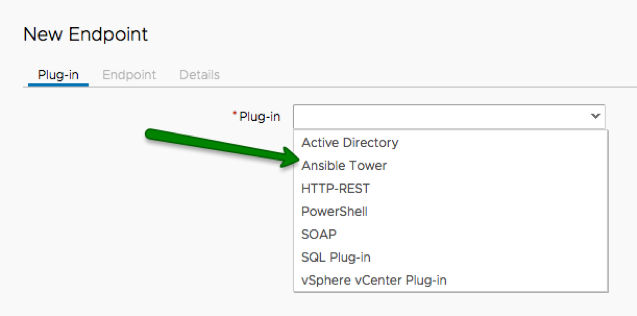
Fig 4
5. Follow prompts to create an endpoint to an existing Ansible Tower (See appendix for Form Field details) 5.1. Give your endpoint a name and optional description (Do not use spaces, dots or special characters in the Name field.)
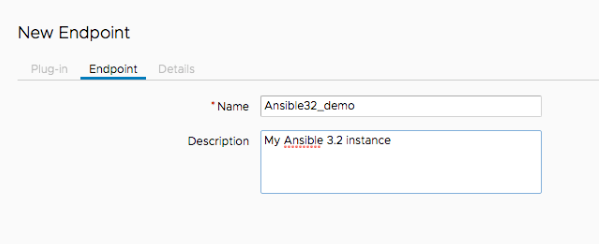
Fig 5.1.1
- Fill in the form for the Ansible Tower Endpoint Configuration

Fig 5.2.1
- Ansible Tower Host access
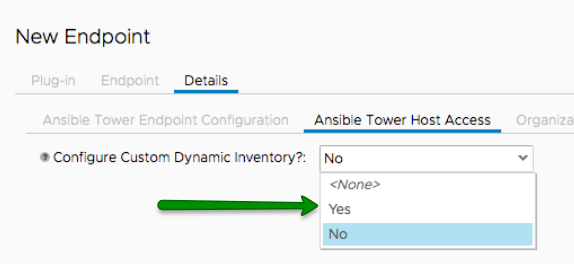
Fig 5.3.1
 This information is used to log into the Tower server and create a Dynamic Inventory directory along with a cache file.
 Choose yes to create a Dynamic Inventory

Fig 5.3.2
- Dynamic Inventory Tab
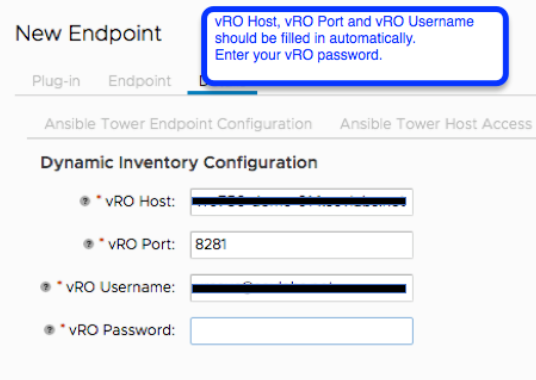
Fig 5.4.1
- Organization and Inventory Tab

Fig 5.5.1
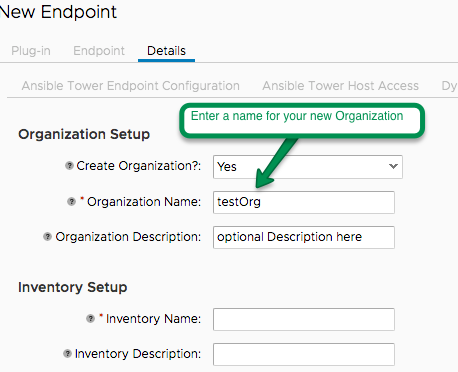
Fig 5.5.2
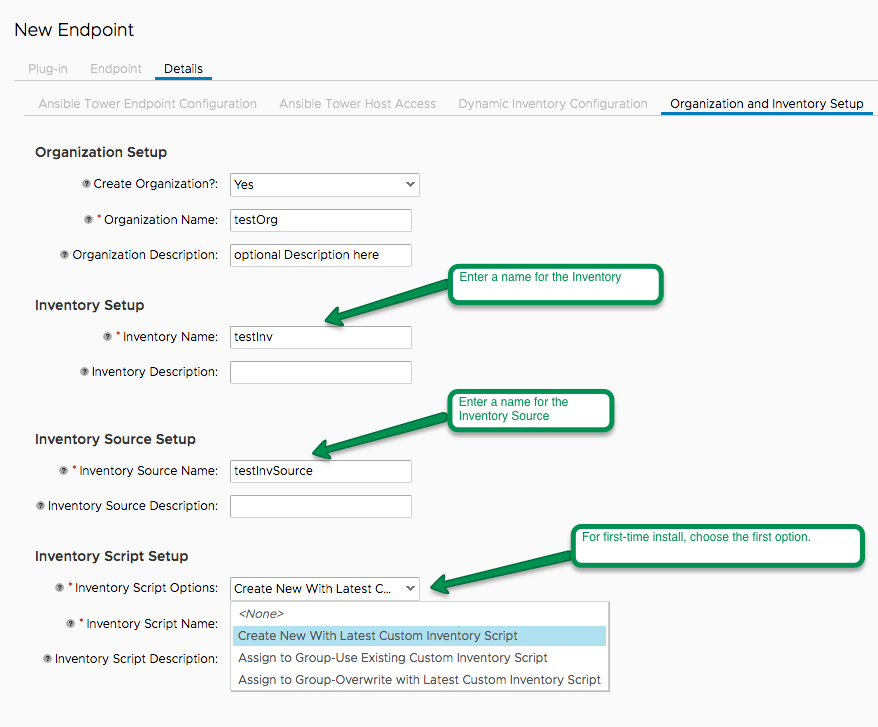
Fig 5.5.3

Fig 5.5.4
- Filters and Groups Tab

Fig 5.6.1
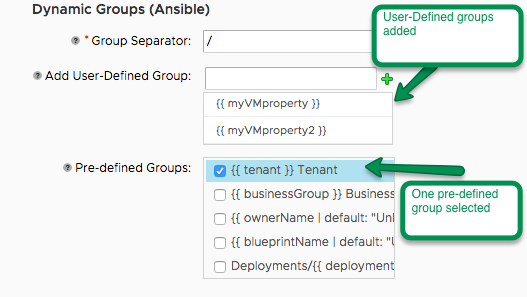
Fig 5.6.2
- Prompt on Launch Overrides The Prompt on Launch Overrides are optional

Fig 5.7.0
6. Click Finish
7. Now there will be a new Endpoint in vRealize Orchestrator Endpoints.
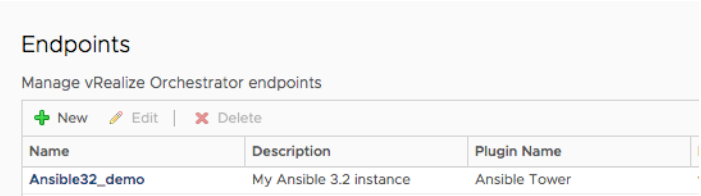
Fig 5.7.1
8. Verify that the Configuration File and Cache Directory were created
- SSH to Ansible Tower as the user specified in step 5.3 Ansible Tower Host access
- Verify
CMFFramework-[inventory-name].yamland similar named cache directory exists
cd /sovlabs
ls -ltrh
Configure Ansible Tower Playbooks for use with plug-in
Configure a Project
This step assumes you have imported your playbooks into your desired source control system and you have the credentials to access that repository. If you have not done so, do that now.
Once you have playbooks uploaded into a repository:
1. Login to Ansible Tower via browser as an administrator
2. Click on the gear icon on the top-right > CREDENTIALS
3. Create or locate the Source Control credential
4. Create or locate a Machine credential. NOTE: If your version of Ansible Tower ties Machine credential to ORGANIZATION, you will need to create a machine credential if you created a new ORG.
5. Navigate to PROJECT, click +Add
6. Fill in the fields to create the new Project
| Organization | Your organization |
| SCM URL | URL of your repository where playbooks are stored |
| SCM Branch | Desired branch on repository (e.g. master) |
| SCM Credential | Credential located or created in Step 2 |
| SCM Update Options | Update on Launch must be checked |
Create a Job Template
7. Navigate to TEMPLATES (or JOB TEMPLATES for v3.2)
8. Click +ADD (or NEW JOB on v3.2)
9. Create JOB TEMPLATE page: all options can be left blank/unchecked except for the following:
| Field | Description |
|---|---|
| NAME | Name of Job Template |
| JOB TYPE | Run |
| INVENTORY | Inventory created by Ansible Tower Endpoint. If vRO Ansible Tower Endpoint has Prompt on Launch for this field, Select PROMPT ON LAUNCH. Note: can be left blank with PROMPT ON LAUNCH checked.</p> |
| PROJECT | Project that contains playbooks |
| CREDENTIAL | Select an appropriate machine credential. This is the credential that Ansible Tower will use to log onto the provisioned machine in order to execute the playbook. If Endpoint has Prompt on Launch for this field, Select PROMPT ON LAUNCH.</p> |
| LIMIT | Must be set to PROMPT ON LAUNCH (always!) |
| VERBOSITY | 0 |
| EXTRA VARIABLES | Optional. If input parameters are required for the playbook, put them here. If the vRO Ansible Tower Endpoint has Prompt on Launch for this field, Select PROMPT ON LAUNCH.<p> |
10. Click SAVE
Configure Blueprint to use the Ansible Tower Endpoint
1. Login to vRA tenant (must be logged in as a service account that has permission to manage blueprints)
2. Go to Design > Blueprints and select a blueprint to be used for provisioning (or create a new blueprint)
3. If one doesn’t already exist, drag a virtual machine onto in the canvas prior to completing the next step.
4. From the Configuration Management heading under the Categories pane of the left-hand side of the screen, select Ansible and drag it onto the canvas into the virtual machine component

Provision

banana
5. In the new pane that is created in the lower half of the screen,
5.1. Select Details
5.2. Select the Ansible Tower configuration, the Organization

Fig 5.2
5.3. Select the Job Template, click Next

Fig 5.3
5.4. Click OK
5.5. Select an Optional Deprovision Job Template. NOTE: This is a job template to be used upon Deprovision of the machine. An example of a job for this might be a playbook that removes the machine from a database, or a monitoring tool.
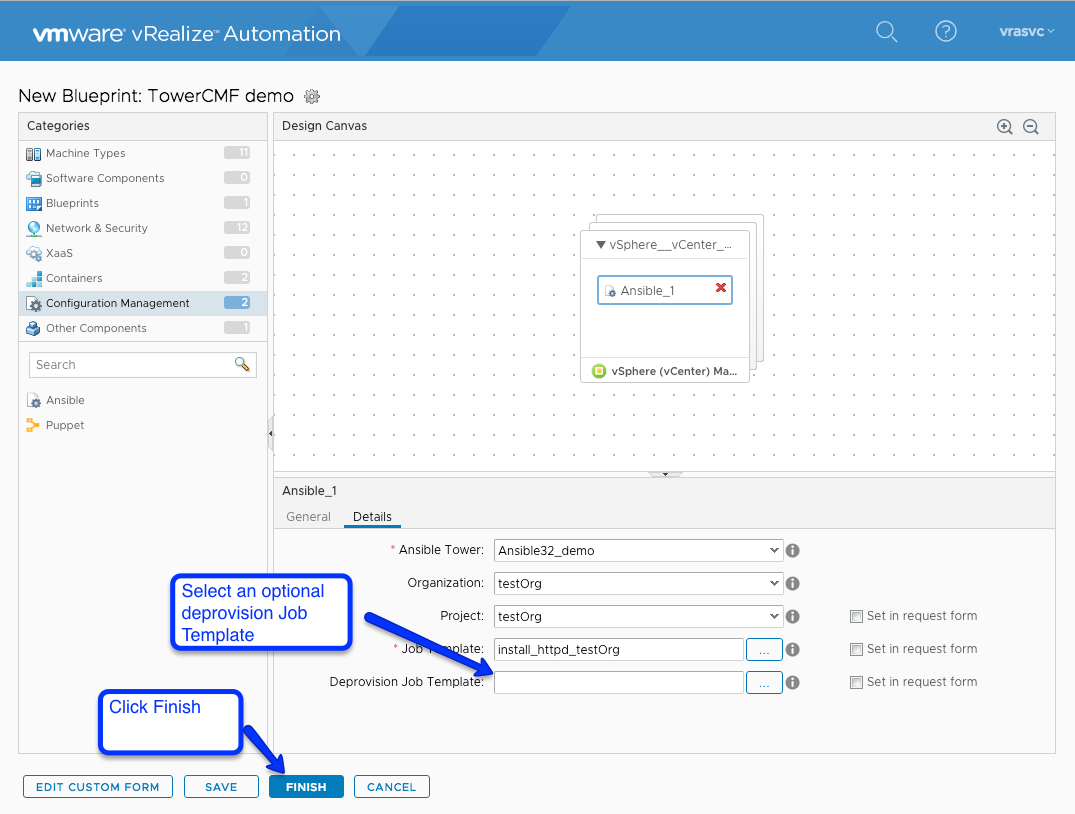
Fig 5
5.6. Optionally, Check the “Set in request form” checkbox to allow the requestor to select Project, Job Template, and Deprovision Job Template at request time.
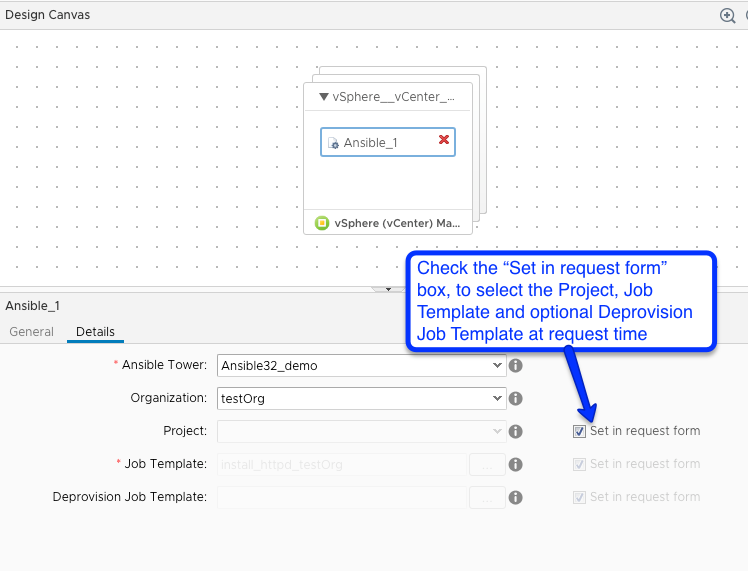
Fig 5.5
5.7. NOTE: Setting “Set in request form” for Project automatically sets it for Job Template and Deprovision Job Template.
6. Publish the Blueprint (apply necessary Service to the Blueprint in the Catalog Item)