Step 2.1
Modify files and set permissions
Modify vmo.properties and js-io-rights files and set permissions
Automate Configure vRO Steps
SovLabs is providing an sov_vro_config.sh script to automate the following steps:
- Step 2.1 - Modify the
vmo.propertiesandjs-io-rightsfiles and set permissions on the vRO server. - Step 2.2 - Create the
krb5.conffile for Kerberos Authentication
sov_vro_config.sh script is provided for convenience. Please review the script thoroughly, pay very close attention to the prompts and carefully enter values when prompted.If used improperly, the results could be detrimental to the functioning of vRO.
Perform Configure vRO steps 2.1 and 2.2 manually if unsure.
Steps
1. Download the sov_vro_config.sh
2. Copy the sov_vro_config.sh script to your vRO appliance in the /tmp folder
3. Make the script executable: chmod +x sov_vro_config.sh
4. Execute the script from the command line and follow the prompts
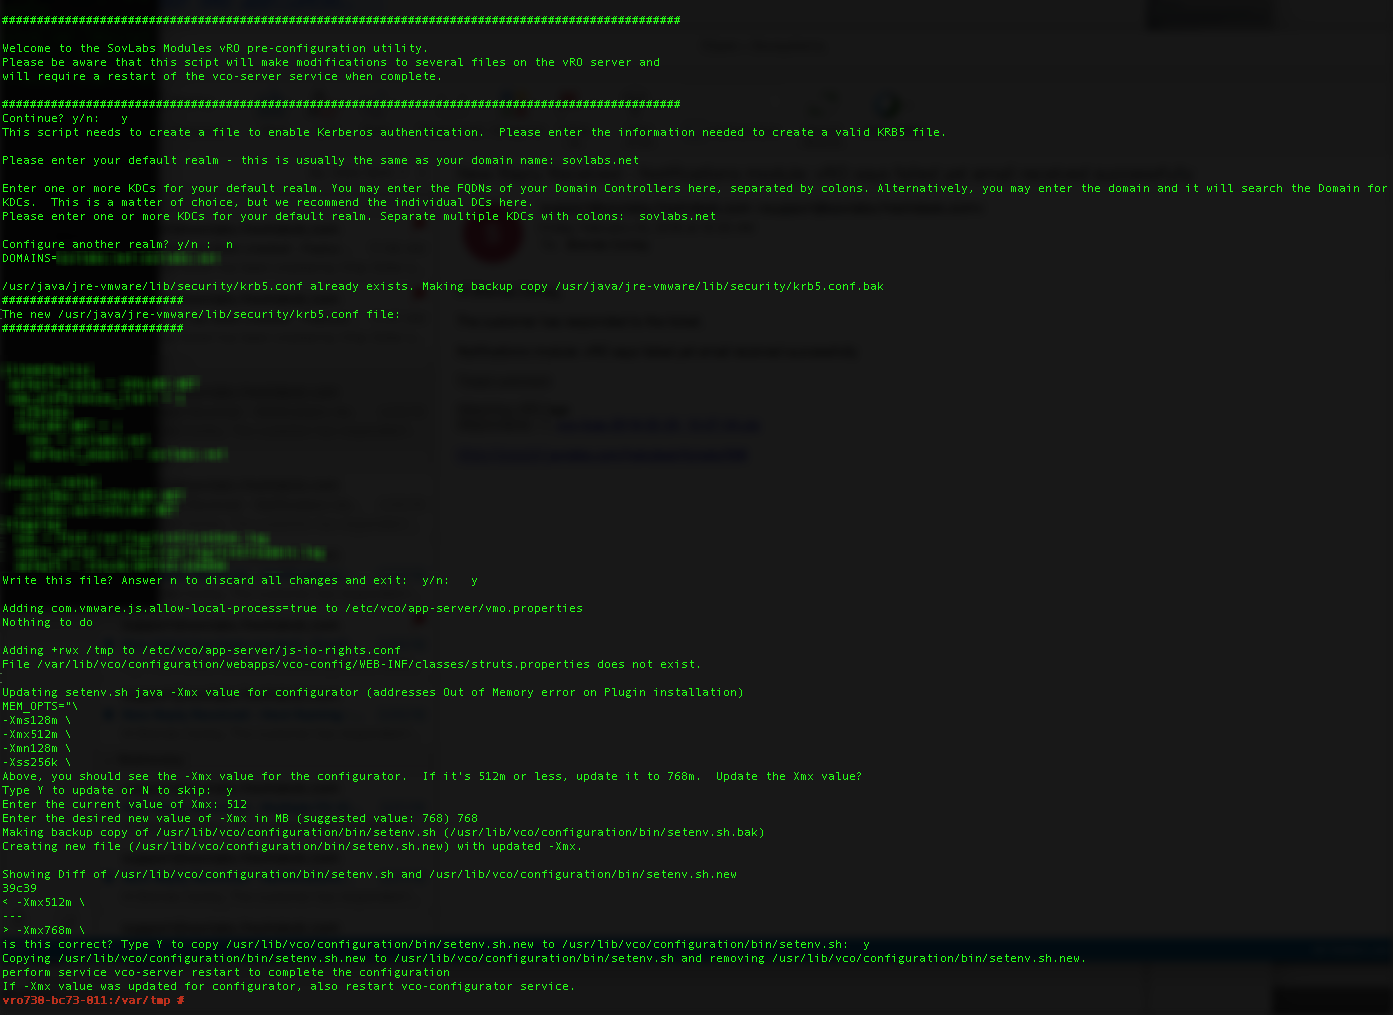
sov_vro_config script output - vRO fig. 1
5. If you have more than one vRO (or vRA if using embedded vRO), run this script on all of them
- Make sure to enter the prompted values exactly the same
6. Skip to Step 2.3 - Create vRO vRA Host
Modify vmo.properties
This configuration change is necessary in order for vRO to execute external applications and perform actions such as ping.
1. SSH as user root to the vRO server (e.g. SSH via PuTTy)
2. Make a backup copy of vmo.properties file
cp /etc/vco/app-server/vmo.properties /etc/vco/app-server/vmo.properties.bak
3. Modify the vmo.properties file:
vi /etc/vco/app-server/vmo.properties
4. Press the i key on the keyboard to edit the file
5. Copy & paste the following line to the end file:
com.vmware.js.allow-local-process=true
6. Press the esc key on the keyboard
7. Type in :wq and press the Enter key to save the file
8. Repeat if you have more than one vRO (or vRA if using embedded vRO)
Modify js-io-rights.conf to set permissions
This configuration change is necessary to allow vRO workflows to write temporary files to the vRO filesystem.
1. SSH as user root to the vRO server (e.g. SSH via PuTTy)
2. Make a backup copy of js-io-rights.conf file
cp /etc/vco/app-server/js-io-rights.conf /etc/vco/app-server/js-io-rights.conf.bak
3. Stop the vRO Configurator service:
service vco-configurator stop
4. Modify the js-io-rights.conf file:
vi /etc/vco/app-server/js-io-rights.conf
5. Press the i key on the keyboard to edit the file
6. Copy & paste the following line to the end file:
+rwx /tmp
7. Press the esc key on the keyboard
8. Type in :wq and press the Enter key to save the file
9. Ensure that the file has the appropriate permissions
cd /etc/vco/app-server
chown vco:vco js-io-rights.conf
chmod 640 js-io-rights.conf
10. The following needs to be performed for the modifications to be permanent:
/var/lib/vco/tools/configuration-cli/bin/vro-configure.sh sync-local
11. Start vRO Configuration service:
service vco-configurator start
12. Restart the vRO server
service vco-server restart
13. Repeat if you have more than one vRO (or vRA if using embedded vRO)