Step 2.4
Create vRO vRA IaaS Host
| Location | Notes |
|---|---|
| vRO client | Create vRA IaaS Host via vRO workflow The vRA IaaS Host may already exist |
You will need the Service Account that was used to configure your vRA service on the IaaS Server.

IaaS Host credentials Screenshot
Create IaaS Host - vRO
1. Login to the vRO client
2. In the Workflows tab, go to: Library > vRealize Automation > Configuration > Add an Iaas host of a vRA Host
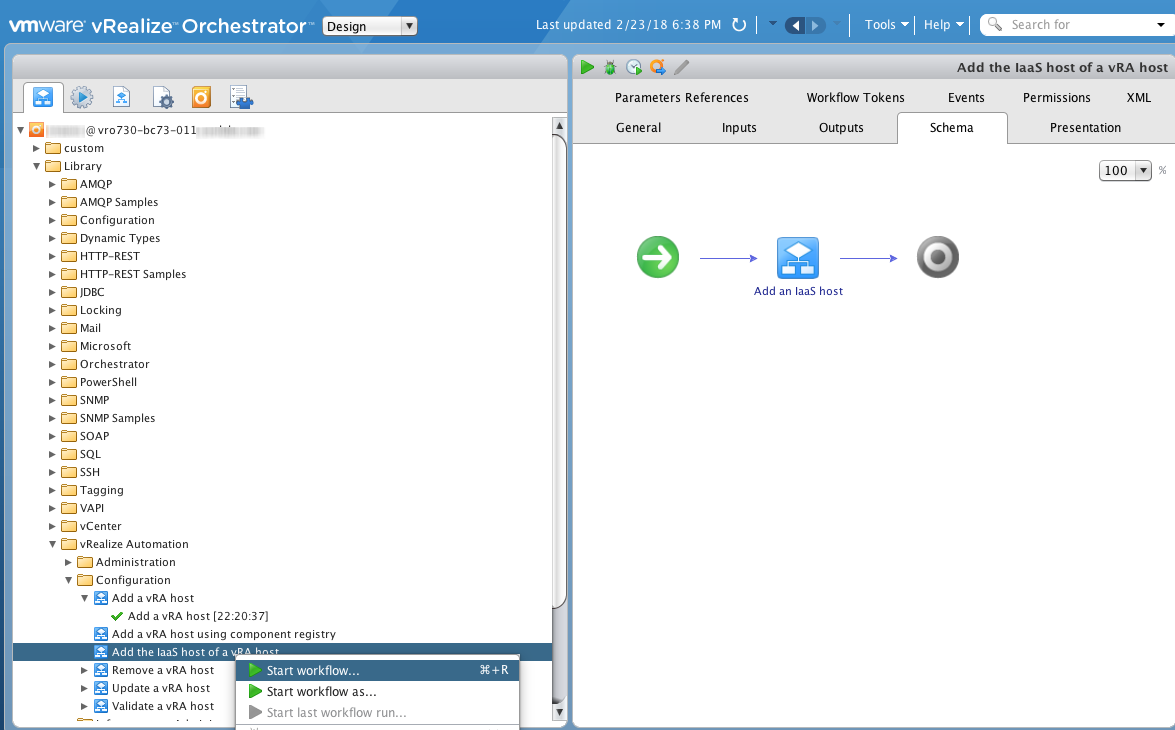
Create IaaS Host - vRO fig. 1 Screenshot
Create IaaS Host - vRO fig. 1
3. Right-click the workflow and click Start workflow and fill out the form:
| Field | Value | Note |
|---|---|---|
| vCAC Host | Choose the appropriate vRA host in the list | Created in Step 2.3 |
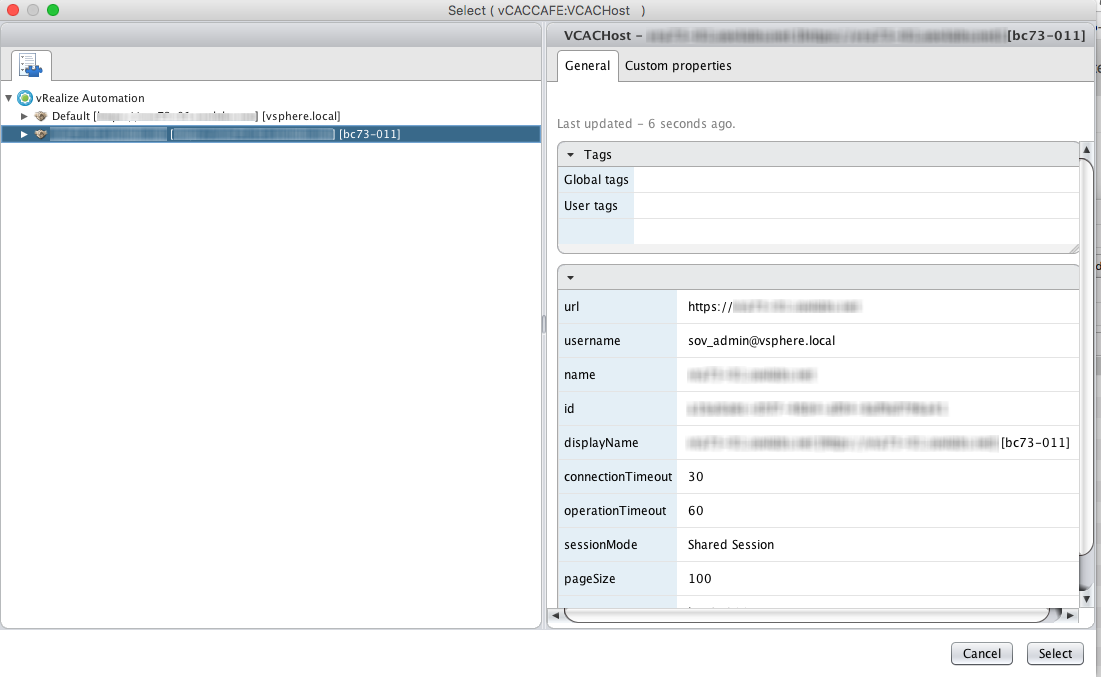
Create IaaS Host - vRO fig. 2 Screenshot
Create IaaS Host - vRO fig. 2
4. Click Next for Host Properties and accept the defaults. The fields should all be auto-filled

Create IaaS Host - vRO fig. 3 Screenshot
Create IaaS Host - vRO fig. 3
5. Click Next for Proxy settings
| Field | Value | Note |
|---|---|---|
| Use Proxy | No unless your installation uses a proxy |
6. Click Next for User credentials
| Field | Value | Note |
|---|---|---|
| Host’s authentication type | NTLM | If using an embedded vRO, you should be able to select SSO |
| Authentication User | Username only, no domain | Service Account used in the VMware Cloud Automation Center service on your IaaS server |
| Authentication Password | Type in username’s password |
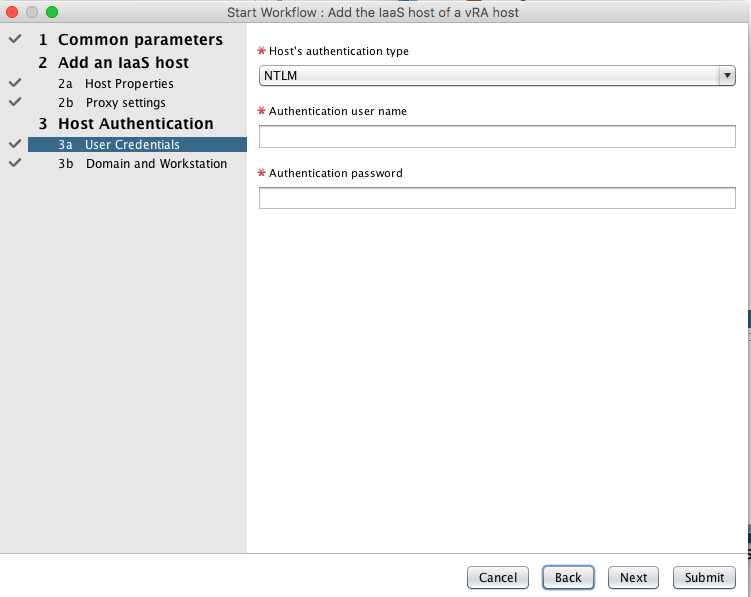
Create IaaS Host - vRO fig. 4 Screenshot
Create IaaS Host - vRO fig. 4
6. Click Next for Domain and Workstation
| Field | Value | Note |
|---|---|---|
| Workstation | Leave blank unless otherwise needed | |
| Domain | Type the domain for the Service Account |
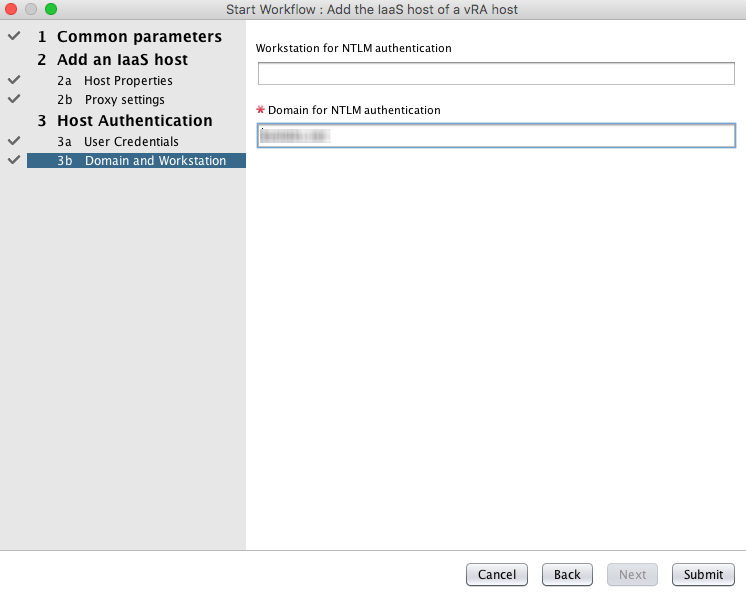
Create IaaS Host - vRO fig. 5 Screenshot
Create IaaS Host - vRO fig. 5
7. Click Submit