Upgrade
Perform an upgrade
Create Backup and Restore
It is recommended to take a backup of everything prior to an upgrade in the event a rollback is required
- Take a snapshot of vRA
- Take a snapshot of vRO
- Export all SovLabs vRO Custom Resources created by customer in a vRO package
Please refer to our Backup and Restore from vRO Package PDF
Download the SovLabs Plug-in
A download link to the SovLabs Plug-in along with a license key will be provided in an email
Upgrade the SovLabs Plugin
| # | Step | Location | Notes |
|---|---|---|---|
| 3 | Install SovLabs Plugin | vRO Control Center |
Steps
1. Login to the vRO Control Center as user root: https://[vRO-FQDN]:8283/vco-controlcenter/#/
Note: If it says page is unavailable (503 error) - Please start the Service manually.
- Built-in vRO: Browse to the vRA VAMI > Orchestrator > Orchestrator User Interface > Start.
- Stand-alone vRO: SSH to the vRO appliance. Run
service vco-configurator startas root. Wait a couple minutes for the service to start.
2. Validate the Cluster Health by clicking on Validate Configuration and letting the checks Complete.

Upgrade-Step 2
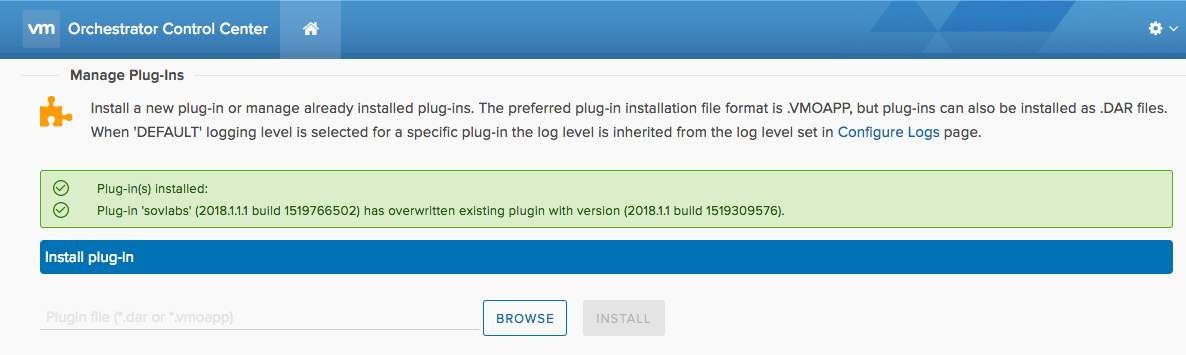
3. Click on the Manage Plug-Ins icon
Upgrade-Step 3
4. In the Install plug-in section, browse for the SovLabs Plugin file (o11nplugin-sovlabs.vmoapp)
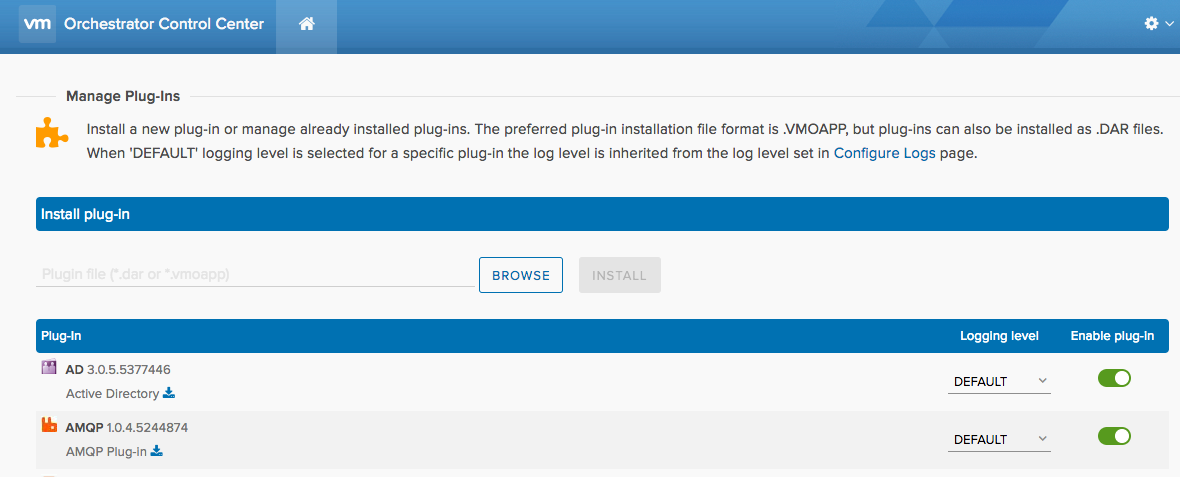
Upgrade-Step 4
5. Select the SovLabs plugin file (o11nplugin-sovlabs.vmoapp) to upload
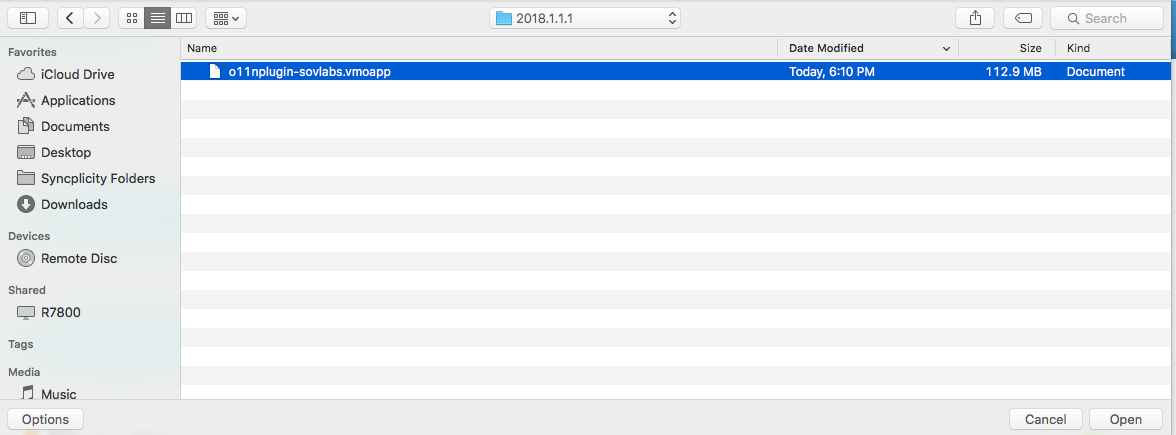
Upgrade-Step 5
6. Click on Install
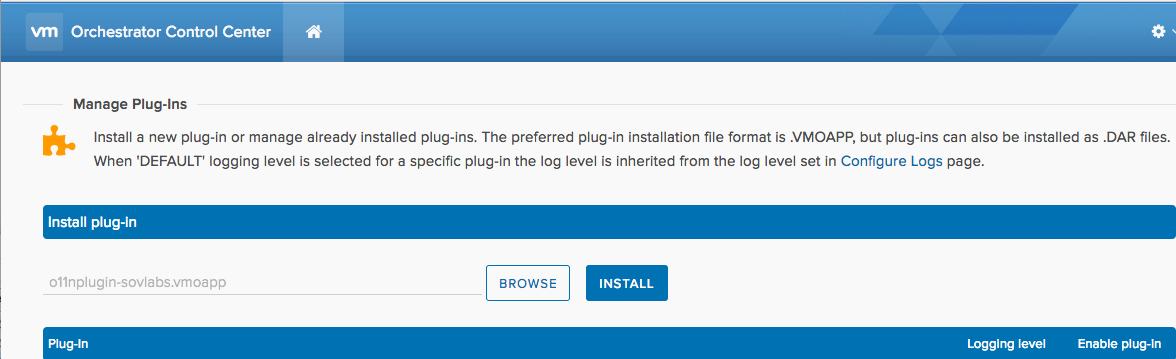
Upgrade-Step 6
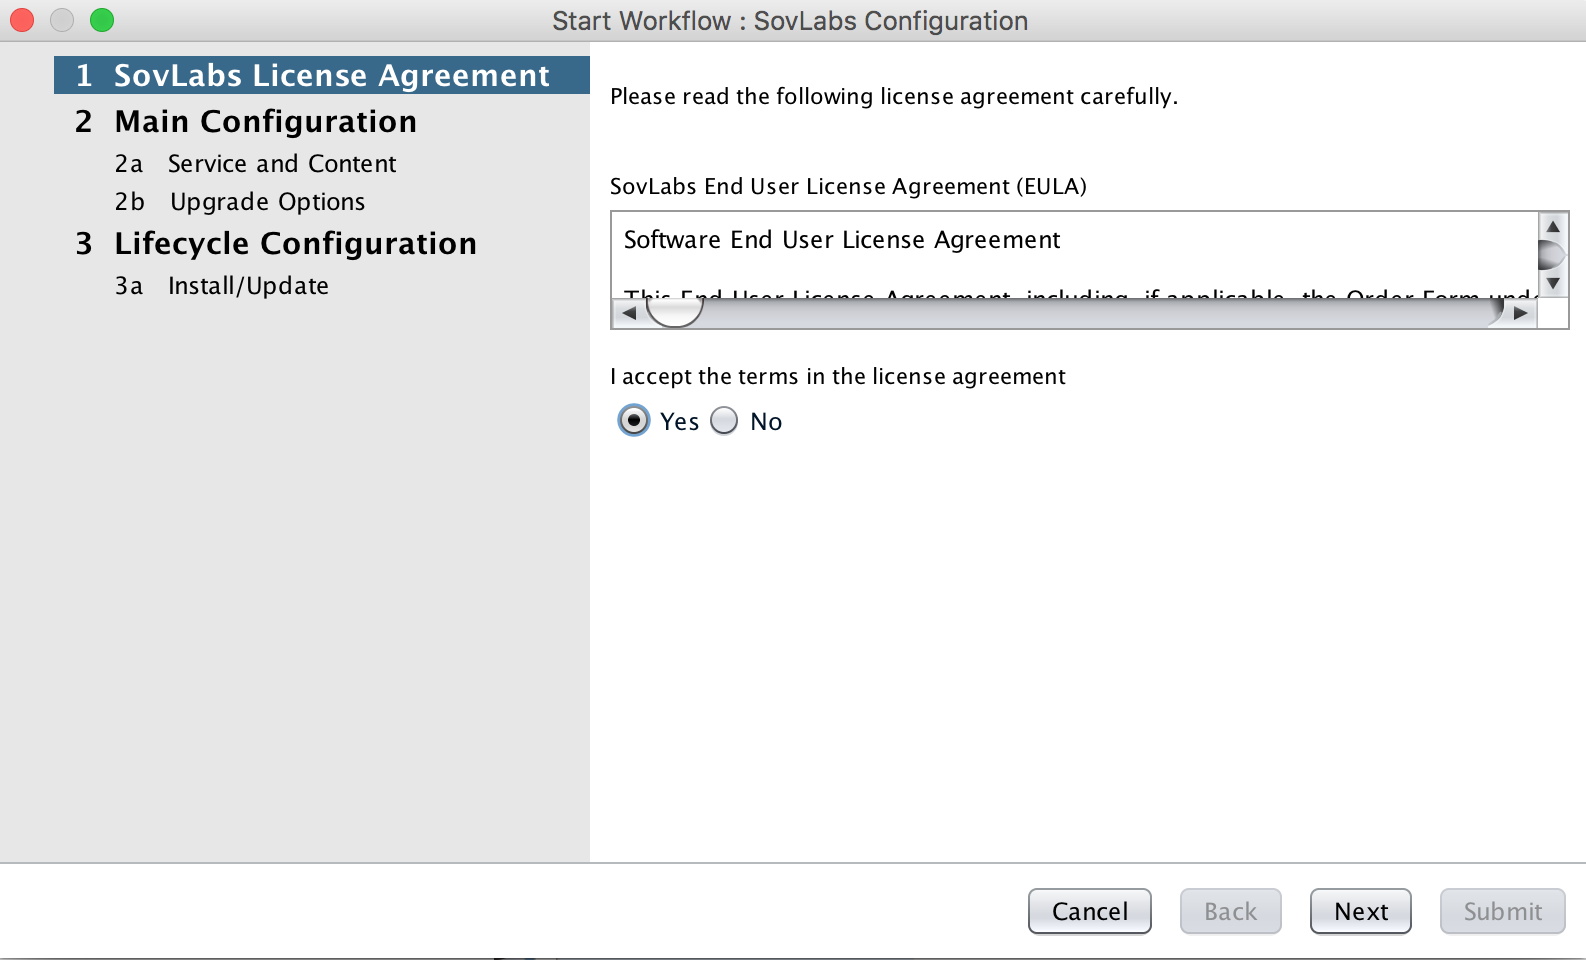
7. Accept the EULA and click on Install

Upgrade-Step 7
8. Successful plugin install message will appear
Upgrade-Step 8
9. Restart the vRO server
- On the Home page, click on the Startup Options icon and click on Restart
- Optionally, SSH to the vRO appliance and type in:
service vco-server restart
Wait for vRO to restart successfully
10. Login again to the vRO Control Center and validate Cluster Health (See Step 2 above)
11. Click on the Manage Plug-Ins icon
12. Verify that the SovLabs Plugin successfully upgraded and is listed among the installed vRO plugins

Upgrade-Step 11
13. Restart vRA Appliance(s) (Typically 10-15 minutes for Services to all ‘Register’ in the VAMI)
Note: Restart vRA/vRO is necessary during a new install or else the SovLabs ‘types’ defined in our plugin will not be available and cause the Configuration Workflow to fail.
If Using Clustered vRO
- Install the plugin on one appliance first
- Restart the vRO service on that appliance
- Wait until the vRO service is completely up in vRO Cluster Manager
- The configurations should automatically sync
Configure the SovLabs Plugin
| # | Step | Location | Notes |
|---|---|---|---|
| 3.1 | Run the SovLabs Configuration workflow | vRO client |
1. Login to the vRO client
2. In the Workflows tab, go to SovLabs > Configuration folder and expand it
3. Right-click on the SovLabs Configuration workflow and click Start Workflow

Upgrade - Configure SovLabs Steps 1-3
In the SovLabs Configuration workflow form wizard:
4. Accept the EULA and click Next
Upgrade - Configure SovLabs Step 4
5. In Service and Content section of the form:
| Field | Value | Note |
|---|---|---|
| vRA Tenant Name | Choose the appropriate tenant | The drop-down may contain multiple tenants |
| Business Group Name | Choose the sovlabs Business Group | Step 1.3 |
| Create SovLabs vRA Catalog Service | No | |
| Security Group Defined in vRA | Type in sov_admins@[tenant] |
Step 1.2 |
| Publish License Content | Yes |
6. Click Next
7. In the Upgrade Options section of the form:
| Field | Value | Note |
|---|---|---|
| Upgrade existing SovLabs vRA Content | Yes | |
| Upgrade SovLabs F5Config-default RESTipe? | Yes | Selecting yes will override the F5Config-default RESTipe with the latest RESTipe from source |
8. Click Next
9. In the Install/Update section of the form:
| Field | Value | Note |
|---|---|---|
| Install or Update SovLabs Workflow Subscriptions | Yes |

Upgrade - Configure SovLabs Step 9
10. Click Submit
Check the vRO Logs for the error message 'Please reboot the VMware vRealize Automation Appliance and try re-running the SovLabs Configuration workflow again.' or 'THIS SHOULD NOT HAPPEN'(legacy).
1. Fix is to reboot vRA appliances - wait for services to Register in VAMI (10-15 minutes).
2. Re-run SovLabs Configuration Workflow. (This is caused by failing to reboot vRO/vRA in the previous section)
Delete Old SovLabs License
-OR- if you obtained a new SovLabs License Key
SKIP this entire section if upgrading within SovLabs 2018.x plugin versions
Steps
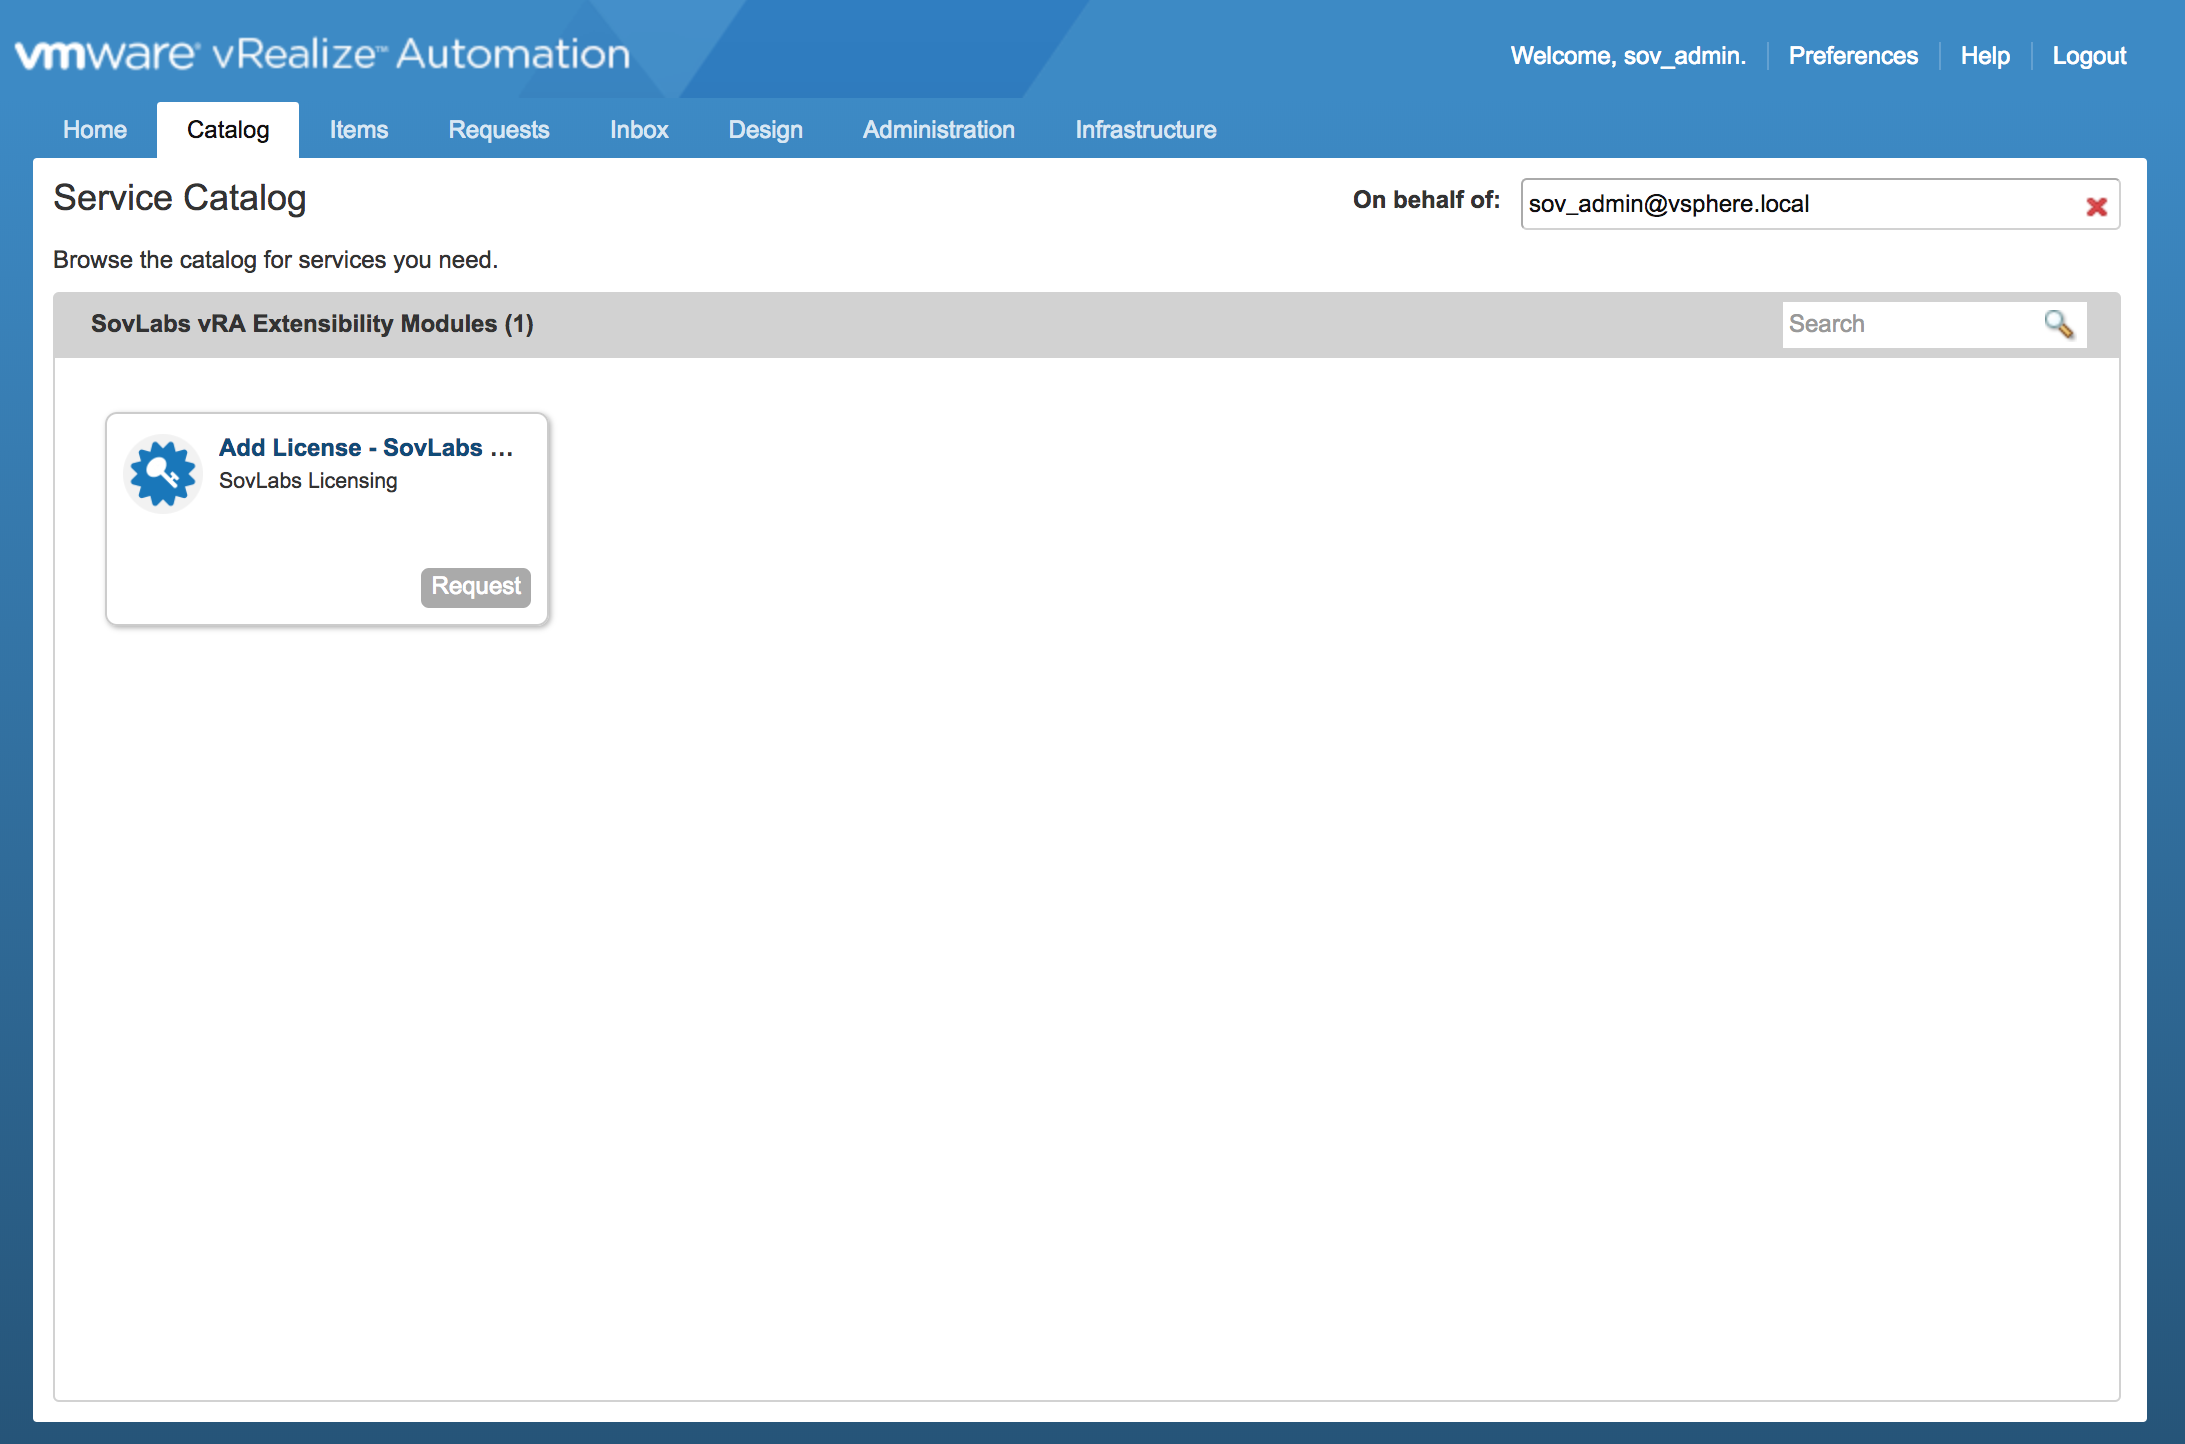
- Login to the desired vRA tenant (e.g. sov_admin@vsphere.local user)
- Click on the Items tab
- Click on SovLabs License tab, which may be in the SovLabs vRA Extensibility Modules tab
- Select the SovLabs license key and go to Actions and click Delete License
- Submit the form
- Under Requests in vRA, the request should complete successfully.
- Repeat if you have multiple licenses (if upgrading from a SovLabs plugin earlier than 2017.x)
Add SovLabs 2018.2.7 License
Please note that the SovLabs 2018.2.7 Plugin needs a 2018.x license key.
| # | Step | Location | Notes |
|---|---|---|---|
| 3.2 | Add SovLabs License | vRA tenant |
-OR- if you obtained a new SovLabs License Key
SKIP this entire section if upgrading within SovLabs 2018.x plugin versions
Steps
- Login to the desired vRA tenant (e.g. sov_admin@vsphere.local user)
- Click on the Catalog tab
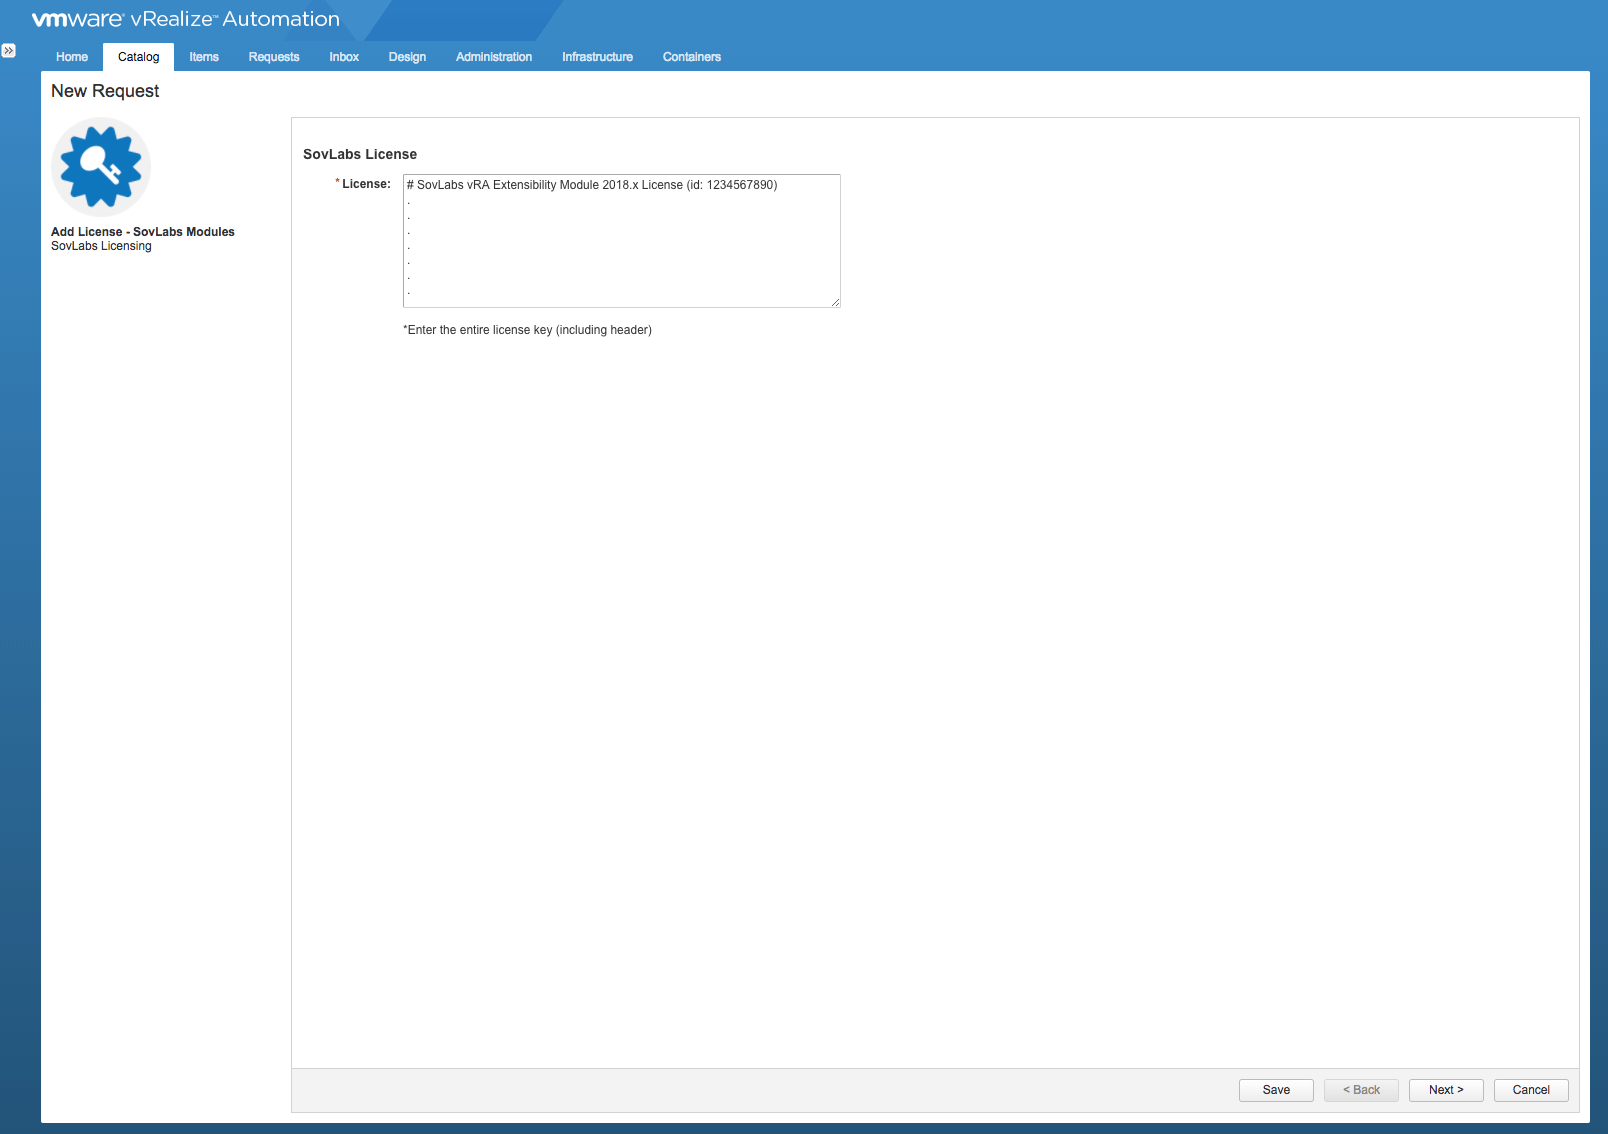
- Click on the catalog item: Add License - SovLabs Modules
- Fill out the form and click Submit
- Under Requests in vRA, the request should complete successfully.
- Once the SovLabs license has been added, SovLabs vRA Catalog Item(s) will appear for the modules licensed
Add License - SovLabs Modules
Add License Form
| Field | Value |
|---|---|
| License key | Copy & paste the entire SovLabs license file provided (including the header) |
Add SovLabs License
View Progress
To watch the progress of the license install workflow:
- Login to the vRO client
- In the Workflows tab, go to SovLabs > License > vRA ASD > Add License
- A vRO workflow token should appear and complete successfully.
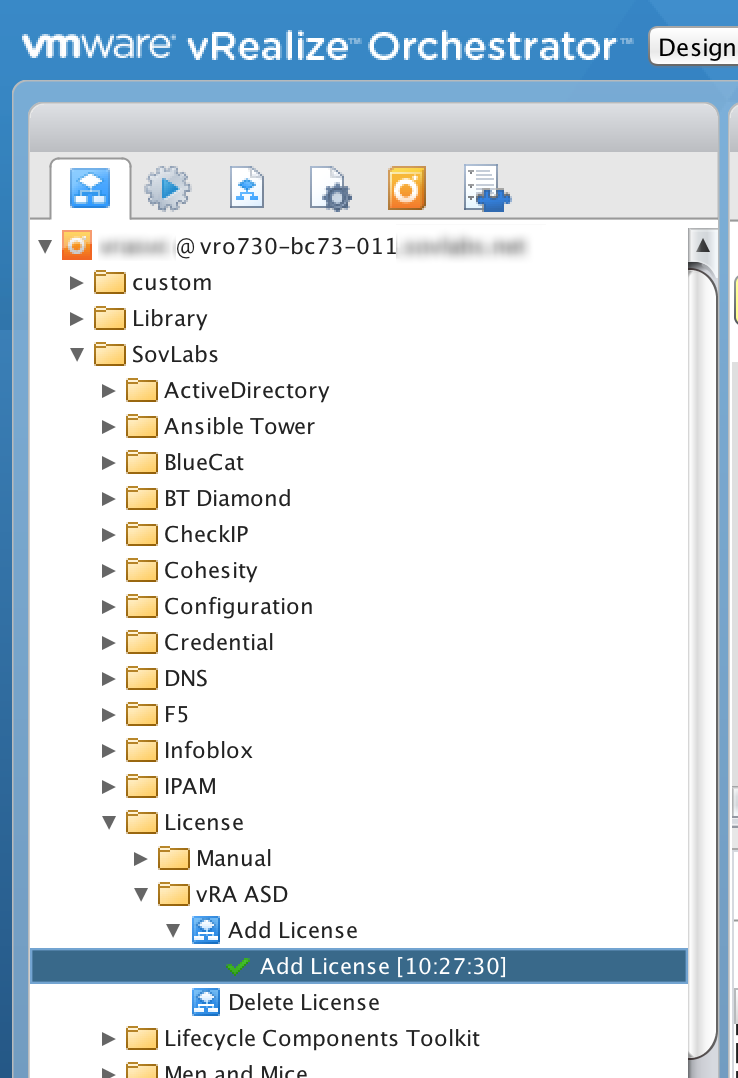
Add License vRO workflow
Results
After the license is successfully added, SovLabs Catalog Items and SovLabs vRA Event Broker Subscriptions will appear/generate

SovLabs vRA Catalog Items
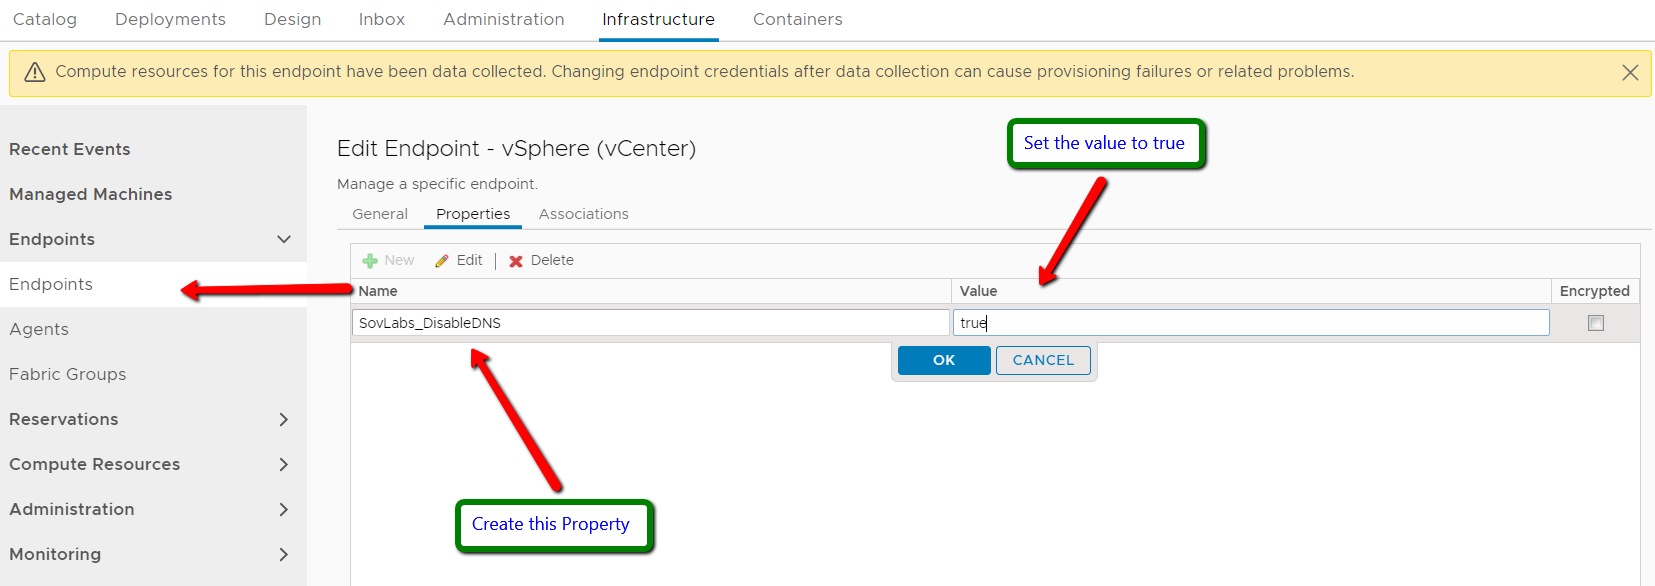
Disable SovLabs DNS Subscriptions
It is recommended once the SovLabs plug-in installation is completed to Disable DNS subscriptions until a ‘Proper’ DNS configuration is created.
Two options are available. Either:
- Login to vRA > Administration > Events > Subscriptions. Select and Unpublish the ‘SovLabs_DNS_machineBuilding’ and ‘SovLabs_DNS_machineDisposing’ subscriptions. (these will be restored any time the plug-in is updated)
- Create the Custom property: ‘SovLabs_DisableDNS’ - value ‘true’. Then apply to all the vRA > Infrastructure > ‘EndPoint(s)’ attached to vRA. This will prevent the DNS subscriptions from executing.
SovLabs Disable DNS